Online users can find beginner-friendly creative paper crafts at the Silhouette Store through its silhouetting machine, which operates using high-quality designer files. Wind power stands as the main subject, and the system ensures effortless project crafting. Novice crafters should choose this theme because its basic folding technique combined with elaborate and multicolored textures is designed specifically for them. The Silhouette Store creates multi-layered art, precise decorative objects, and pop cards for users who are concerned.
Through 3D design, you can access an infinite array of themes and make specialty creations and customized gifts for your closest connections. Past that, 3D paper crafts serve as an efficient tool for hand control growth alongside creative stimulus development. Various ways to begin 3D papercraft exploration will be explained in detail throughout the following text.
Basics of 3D Paper Crafts
Assorted handling operations on paper form the basis of 3D papercraft projects. Flat objects receive folding and cutting procedures, which result in in-depth features and additional dimensions of artwork. The most interesting quality of Three-dimensional designs lies in their ability to convert basic paper sheets into elegant artwork.
Essential Tools for Beginners
A brief collection of tools is necessary for beginners who want to start working on 3D paper crafts.
| Essential Tools for Beginners | Description |
| Cutting Machine | A Silhouette cutting machine is ideal for precise cuts. |
| Quality Paper | Use cardstock or specialty papers for durability. |
| Adhesives | Glue sticks or double-sided tape work best for assembly. |
| Scissors | A good pair of scissors is essential for manual cutting. |
| Ruler and Pencil | For measuring and marking your cuts accurately. |
3D Papercraft Fun Concepts
The following list contains suggestions that will help you develop your new adventure.
Pop-up Cards
Using card forms represents an excellent method to captivate your friends and family on unique occasions. These paper crafts of three-dimensional designs not only aim to impress but also ensure an added personal touch to celebrate one’s occasion.
Required materials:
In order to make a pop card, you need to bring a few pieces of documents together:
- Cardstock: These should be of a bright shade to make them more appealing to the eyes.
- Scissors: A small but sharp set of scissors is required to make cuts accurately.
- Craft knife: For cuts that are a little too delicate and detailed.
- Glue: Some good shapes can be made by using glue that is of high-temperature masonry.
Guidelines
Follow these simple guidelines to help create an exquisite pop card.
- Folding the card: The first step is folding the card in two in order to make the base of the card.
- Cutting the foam: From another cardboard box, cut out the shape of flowers or hearts or anything else that you desire.
- Card slot: On the card that you are creating, cut a slot that will allow the display of your cut-out forms.
- Insert and fix: Place the dasher block with the cutting die in the opening and paste it.
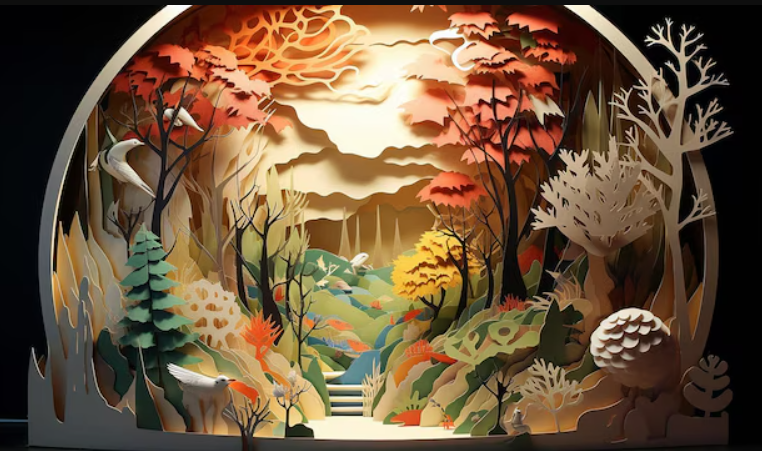
Layered Art: Supplemented by Depth From 3D Models
Layered Art, as its name suggests, refers to an astonishing approach to design as it helps to add complexity and layering to your artwork. The project applies 3D designs to create visually appealing art pieces. The process converts plain cardboard materials into complex artistic structures. This method is a great starting point for users who want to study 3D advancements.
Necessary Materials
- Cardstock: Cardboard in various colors for visual appeal.
- Cutting machines: Used for accurate cutting.
- Foam glue dots: used to create dimension
Craft Instructions
- Design: Software development must create each artwork level for cutting machine operation requirements. The planned result strongly depends on effective planning during this stage.
- Cut: A cutting machine helps you make precise cuts that match the design layout. Cutting the materials accurately produces professional-looking final results.
- Assemble: Assemble each layer and stick them together with glue foam dots to create the art.
Decorative Boxes
Building decorative boxes is fun and easy. It’s perfect for new 3D paper artisans. The boxes serve as gift options, storage, and stylish decorations for your home.
Required Materials
A beginner can begin their project by gathering these necessary documents:
- Cardboard: Sustainable cardboard comes in various colors and patterns to match your style.
- Scissors: The endless pairing capabilities of help decrease the entirety.
- Ruler: Accurate measurement of abbreviations requires the use of a ruler.
- Bone folder: The bone folder assists in achieving precise folding of the cardstock.
Instructions
The process of building this decorative box requires the following proper steps.
- Measure: Start by measuring carefully. Then, use those measurements to cut a square from cardboard. The dimensions of the project depend on individual requirements.
- Create folds: A ruler serves to mark lines with equal gaps on each edge of the square frame. This creates a fold.
- Create the shape: The blocked line needs careful folding to create the box shape in the warehouse step.
- Fix the box and decorate: As the last step, decorate the box with individual bars made of washi tape and branding materials.
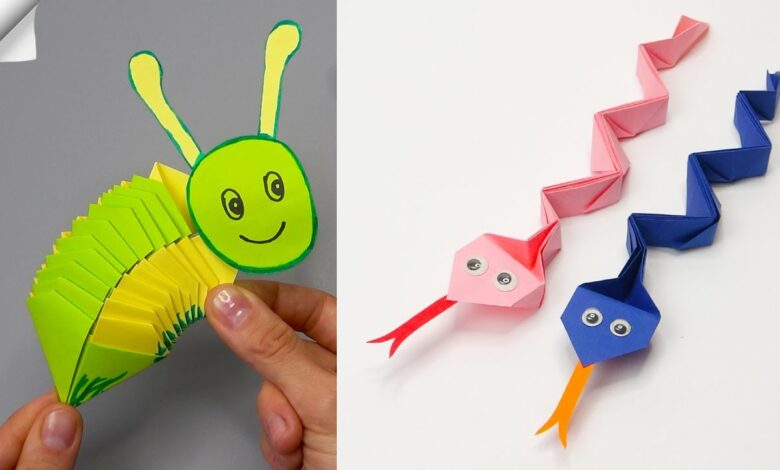
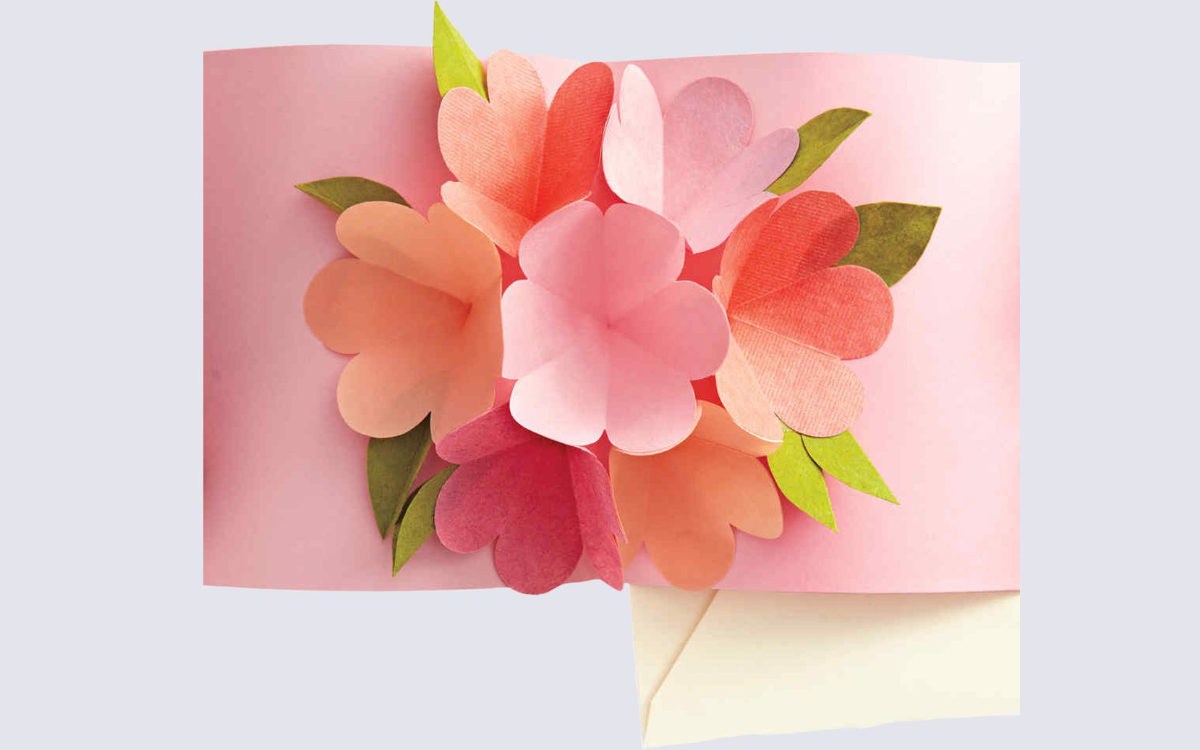
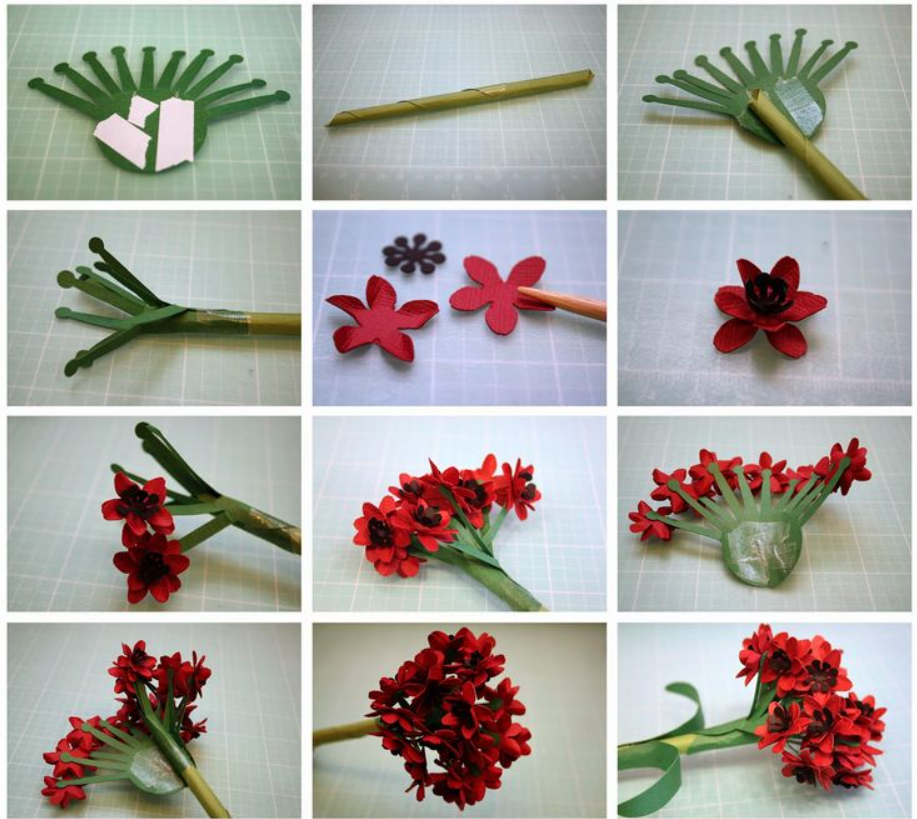
3D Paper Flowers
Making stunning three-dimensional paper flowers is a brilliant method of making a room come alive. These lively creations can add remarkable pieces of accent or can be cherished as gifts. Let’s have a look at how to prepare for this engaging project:
Required Materials
To prepare a 3D flower, you will need the following ingredients:
- Color paper: Select from a bouquet of different colors to create your flower arrangement.
- Scissors: A sharp scissors will work best to cut out the petals.
- Floral wire: This will serve as the stems of your flower.
- Tape: Use tape to secure the petals and leave as well.
Instructions
To prepare 3D paper flowers, simply follow these steps in order:
- Cut the shapes of the petals: Start the process by cutting out your paper into flower petal shapes. Each flower can have different shapes and sizes.
- Layer the petals: Take the already created petals and layer them in the manner that you wish. Secure them accurately to the base using flower thread.
- Fix with tape: Twist the wires together to hold the petals in place underneath. If you want to, you can also put some leaves on.
How to Succeed
The success tip for beautifully making 3D paper flowers comes down to these methods:
Precision Cutting
Use a cutting machine for cutting: Investing in a Silhouette cutting machine will take a long time because of the detail it can create. Automating the cutting process saves cost and time as our main focus shifts towards assembling everything imaginatively. Accuracy is critical to polishing and refining contractions that add to your 3D designs.
- Textures to experience
- Variously light different items, including:
- Use special papers: Special papers such as metal or glitter textured papers are patterned, which further enhances visuals.
- Creating depth: The multi-layered combination of textures could add sophistication and measurements to your designs.
- Color Coordination: The ability to select complementing colors that enhance your final piece creates a flawless look.
Practice the Fold Methods
- Mastering various folds enhances the quality and detail of your projects. Carefully crafted patterns include:
- Valley folds
- Mountain folds
- Accordion Folds
- Use a bone folder: This tool makes precise, clear creases. It improves the structure of your work.
- Embrace your creativity: Now that you have freedom, embrace your creativity. Try different folding methods to create your own unique style of 3D paper craft.
Using these different methods can boost your 3D design skills and reduce stress.
Resources for the Beginner
Starting 3D paper crafts online can be exciting. There are countless resources to improve your design skills.
YouTube Textbook
YouTube is a Ministry of Finance that is responsible for creating textbooks. Many channels focus on paper projects. They provide clear instructions for various activities. Get textbooks for creating amazing three-dimensional star origami or intricate pop-up cards. These videos are great for beginners. They take a practical approach to understanding text. You can build confidence in your creativity by looking at these templates.
Virtual Collaborative Work Environment
You can improve your work experience with a topic. Artisans can identify a forum or even a social network group to post work-related issues. There is much to discuss and share, so there is a chance to look for inspiration. Talking to enthusiasts makes you eager to try new 3D repairs. It helps you improve your skills. Such groups create a therapeutic environment. They foster innovation alongside collaboration. You can showcase your work, ask for comments, and more.
Design Software
To build custom 3D designs, one should be knowledgeable about design software. Silhouette Studio and Cricut Design Space are great for making patterns and shapes for your projects. These tools work together by making precise cuts and overlaps. They improve your work. Multiple online guides show you how to use these software options. It simplifies the process of designing specific ideas for novices.
Conclusion
Attention to creative events such as 3d paper crafts helps improve your artistic abilities and, at the same time, offers you an outing for fun and play. There is a project for everyone, whether you want to execute them with pop-up cards or works of art in layers. Today, you can travel very easily from resources such as the Silhouette Design Store! These professions can be opportunities for you to develop your creativity and consequently give yourself joy and satisfaction.